

Soldering is widely accepted as one of the most standard methods of making reliable connections to PZT elements.
It is direct, simple, mechanically sound, and combined with customizable electrode patterns – is applicable to almost any geometry or application. Our below discussion will be focused on standard fired-on silver electrodes. Below are step by step soldering instructions, followed by a variety of solder materials used by APC and their properties and processing parameters.
Attaching Leads via Soldering
The Procedure for most hand soldering processes is the same:
Step 1:
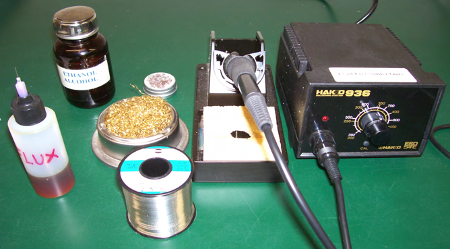
Begin by gathering and organizing all necessary materials
- Piezo Components
- Soldering Iron
- Solder
- Tip Tinner
- Pencil Eraser or Steel wool
- Flux(active rosin for most applications)
- Cleaning Solvent (alcohol preferred)
- Wire Leads
- Cotton Swabs

Step 2:
Turn on the soldering iron and allow it to reach stable and saturated operating temperature. This should be confirmed with a soldering iron tip temperature meter such as the Hakko FG100B type. Recommended iron temperatures for various solders are listed below.

Step 3:
If your leads are not pre-stripped and tinned, now is a good time to prepare them. Stip and appropriate amount of insulation from the end of the lead and tin the lead end with the solder you will be using for your connection.

Step 4:
Arrange leads and piezo components

Step 5:
Prepare the surface of the piezo if desired. This is not necessary but can help with solder wetting and improve solder flow while using the lowest possible soldering temperature. Surface preparation to remove the silver oxide layer is a gentle abrasion with steel wool, or a pencil eraser. If opting to prepare the solder area, clean the surface with alcohol after preparation before proceeding.

Step 6:
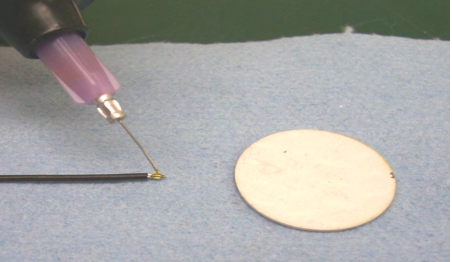
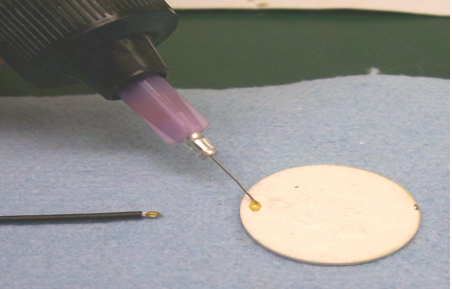
Place a small amount of flux on the wire, followed by a small amount of flux on the piezo in the desired location.

Step 7:
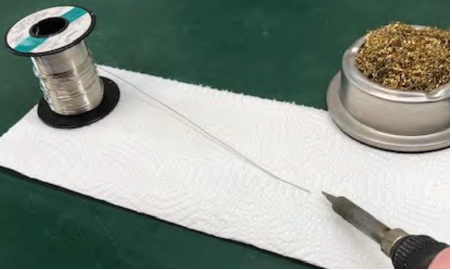
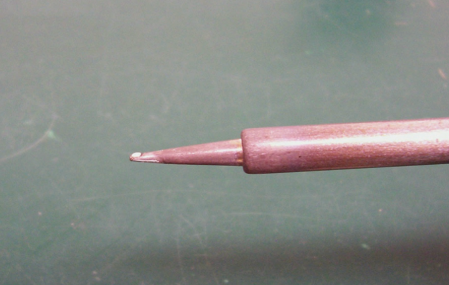
Clean soldering iron tip and melt a small amount of solder onto the soldering iron tip. The molten solder ball should be ~1/32″ diameter.

Step 8:
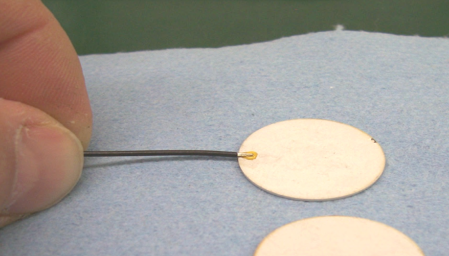
Place tinned wire onto piezo for soldering (directly onto flux dot)
Step 9:
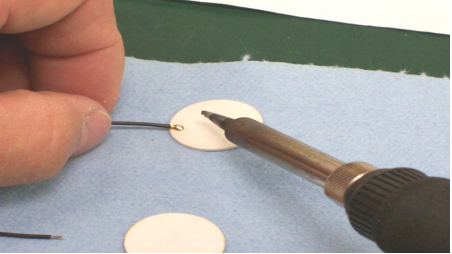
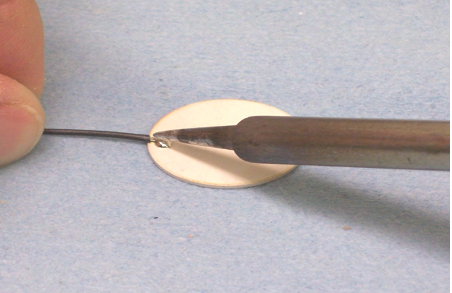
Align iron (with melted solder dot facing down) over piezo and lead joint location in preparation of performing the actual soldering PROCESS. Then slowly lower the iron onto the lead/piezo and allow the solder to flow. The contact time should be NO MORE than 1-2 seconds MAX.
Step 10:
Slowly remove the iron while maintaining lead position and allow solder joint to solidify (~2 seconds)

Step 11:
Clean any excess flux with solvent (alcohol) and a cotton swab

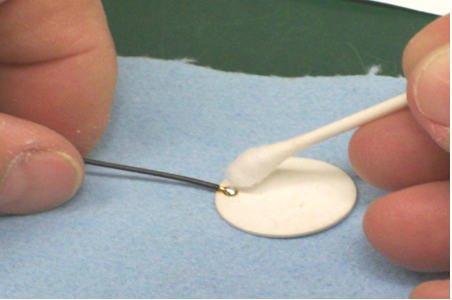
It is worth noting that solder dot size and location play a role when connecting to piezos. Generally speaking, using the smallest gauge wire possible results in the smallest solder dot possible. This reduces the chances of “damping” the components response. The location of the solder joint can also affect the response of the component. Keeping the solder joint as close to the edge of the component as possible (figure 3) reduces the “damping” effect, while placing a large solder joint near the center can exacerbate that same effect.
Good quality electrical connections are absolutely essential to device performance and longevity. The process of hand soldering is an acquired skill. Time, practice, and patience help to develop a consistent technique. The engineering and technical assembly staff at APC International are experts at making reliable connections to PZT and we are willing to share some of our expertise and accumulated knowledge if necessary – so please contact APC International with questions or for a review of your termination process.
Solder Recommendations and Properties
APC International has a tremendous amount of experience using various types of solder materials based on each unique customer applications.
Traditional Leaded (Pb) solder (old school)
- Sn62 – (Sn62/Pb36/Ag2)
- Melting Point : 180C
- Recommended Soldering Tip Temperature : 325C +/- 25C
- Still common in government/military applications
- Pb helps eliminate “tin whiskers” increasing reliability and life
- Lower soldering temperature than most mainstream “lead-free” options
Lead Free Solder Options (RoHS Compliant)
- Sn96 – (Sn96/Ag4)
- Melting Point : 220C
- Recommended Soldering Tip Temperature : 375C +/- 25C
- Indium 241 – (Sn95.5/Ag3.8/Cu0.7)
- Melting Point : 220C
- Recommended Soldering Tip Temperature : 375C +/- 25C
- Alpha Lead-Free – (Sn96.5/Ag3.0/Cu0.5)
- Melting Point : 220C
- Recommended Soldering Tip Temperature : 375C +/- 25C
- Sn96.5 Currently standard at APC unless otherwise specified
- Copper(Cu) addition helps with wetting and solder flow
- Higher melting temperature than leaded materials
Low Temperature (Lead-Free) Solder Options (RoHS Compliant)
- Chipquik SMDSWLT – (Bi57/Sn42/Ag1)
- Melting Point : 138C
- Recommended Soldering Tip Temperature : 230C +/- 25C
- Indium 282 – (Bi57/Sn42/Ag1)
- Melting Point : 140C
- Recommended Soldering Tip Temperature : 230C +/- 25C
- Chipquik SMDSWLT is APC preferred low temperature solder
- Lower melt temperature can be a plus in select applications
- Exposure to Leab(Pb) can affect melt temperature and joint quality so care must be taken when using
Recommended Flux Options
- Kester 1544 Active Rosin Flux (liquid)
- Radio Shack 64-021 or equivalent (paste)
Additional Resources
Having trouble soldering? Contacting APC International to review your technique and application is the best option for solving the problem, however with enough interest APC will present a “soldering troubleshooting” newsletter. If interested please be sure to suggest a future topic.
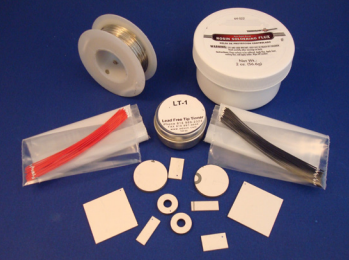
APC’s Lead Free Solder Options found on the website is a great introduction to different types of solder for RoHS applications, our Soldering Instructions will guide you step by step through the process, and our Soldering Kit that includes all of the things (with the exception of a soldering iron) that you need, all combine to ensure success.

Dont Feel Like Soldering? Dont forget about APC Internationals Assembly and Contract Services!
To help our customers rise above the challenges of working with piezo materials, APC offers a wide range of custom solutions including: device assembly, contract manufacturing, design consulting, and product development support.
Customers currently taking advantage of APC’s decades of experience in epoxies, bonding, potting, and soldering have seen increased performance and yield while taking advantage of reduced internal costs, space savings, and overflow manufacturing capacity.
Assembly & Contract Manufacturing services offered by APC Include:
- piezo transducer and sensor development
- assembly of piezo ceramic devices, subassemblies, and components
- level, flow, and pressure sensors assembly
- print head manufacturing
- accelerometer development
- unimorph & bimorph assembly
- cleaning transducer assembly
- stack & flexing actuator production
- soldering/wire attachment
- custom cabling with custom connectors
- shielding
- general bonding, potting, sealing
- bonding of various nebulizing devices
If you have interest in letting APC assist you with contract assembly work, overflow manufacturing, or second sourcing please contact our technical team today.
Only Need a Few Piezos for a New Project, and Need Them FAST ?
If you are starting a new project and need a couple of standard piezo ceramics to test then look no further than APC’s sale ceramics. They are discounted and available for QUICK DELIVERY! (In most cases shipping occurs within 1-2 business days)
Available sale ceramic categories include:
- Piezo ceramic shapes (discs, plates, rings)
- Stripe Actuators
- Disc Benders (Unimorphs)
- Air Transducers
If you wish to place an order for sale ceramics, submit a quote here.
Have more questions or need something specific, contact any APC Sales Representative to discuss your needs!